Peanut Butter Oatmeal Bars

DSC_0822

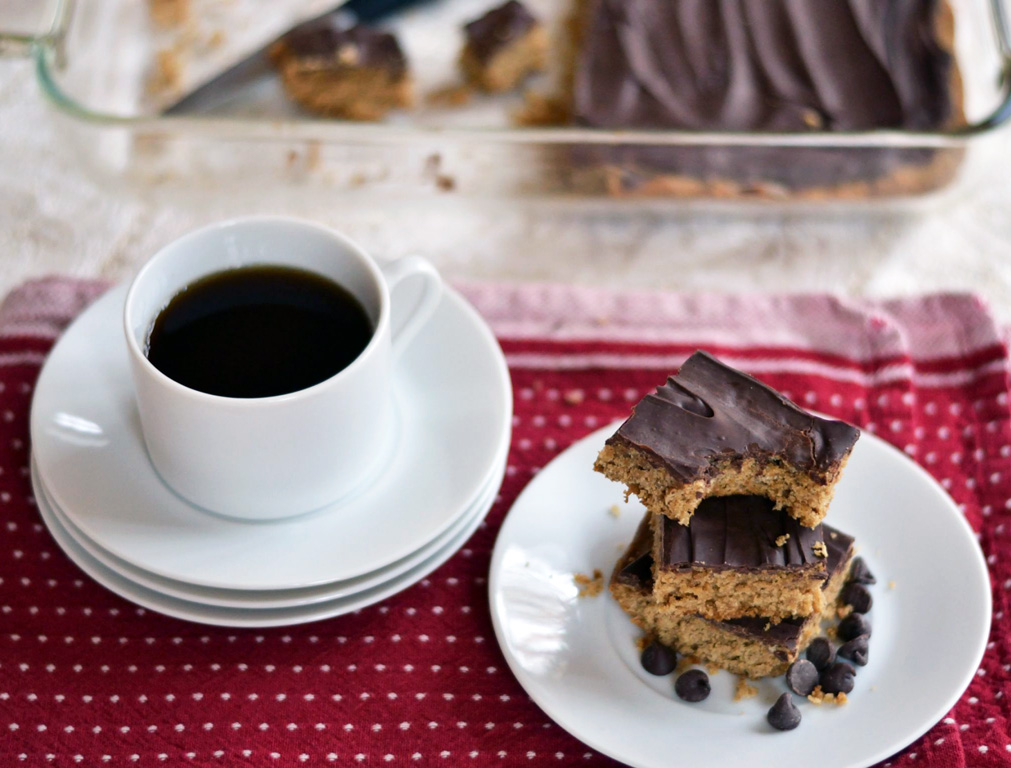
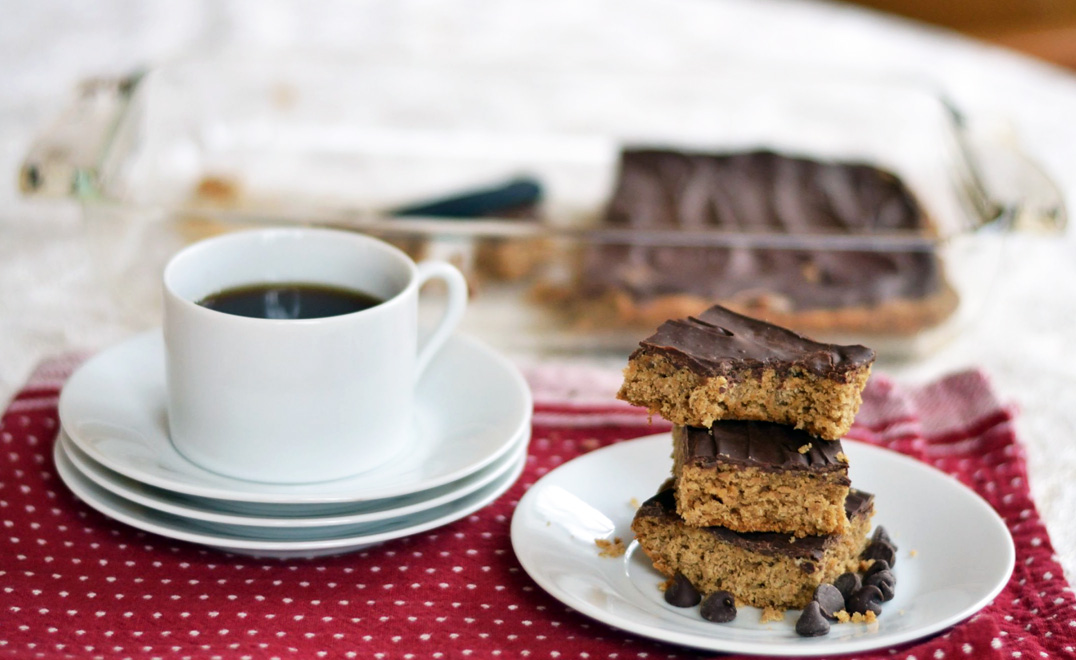
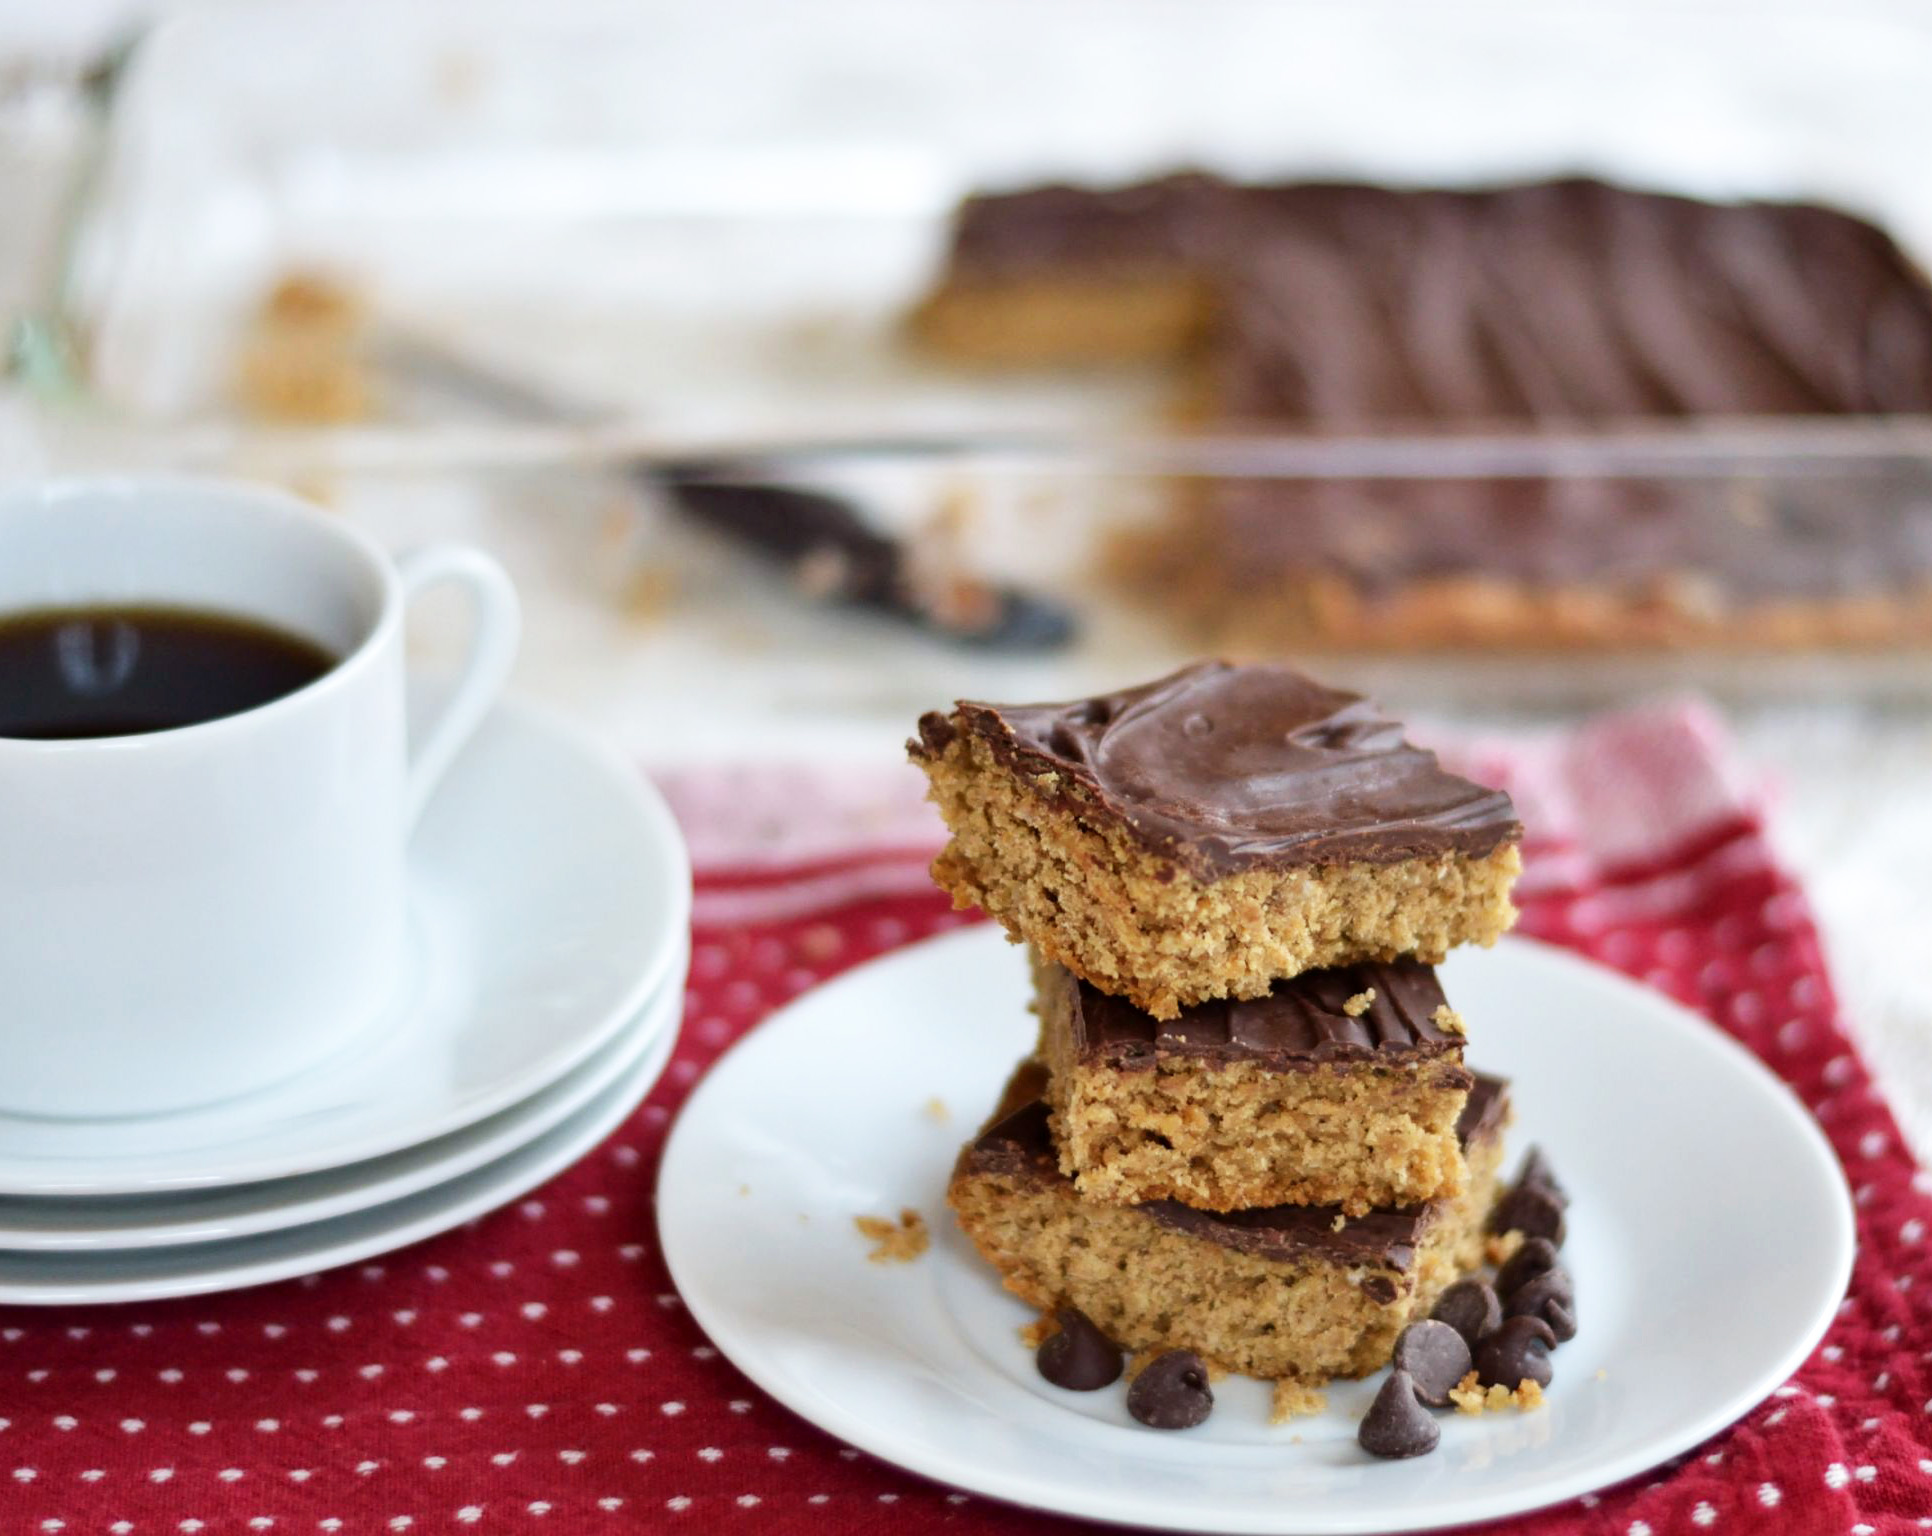
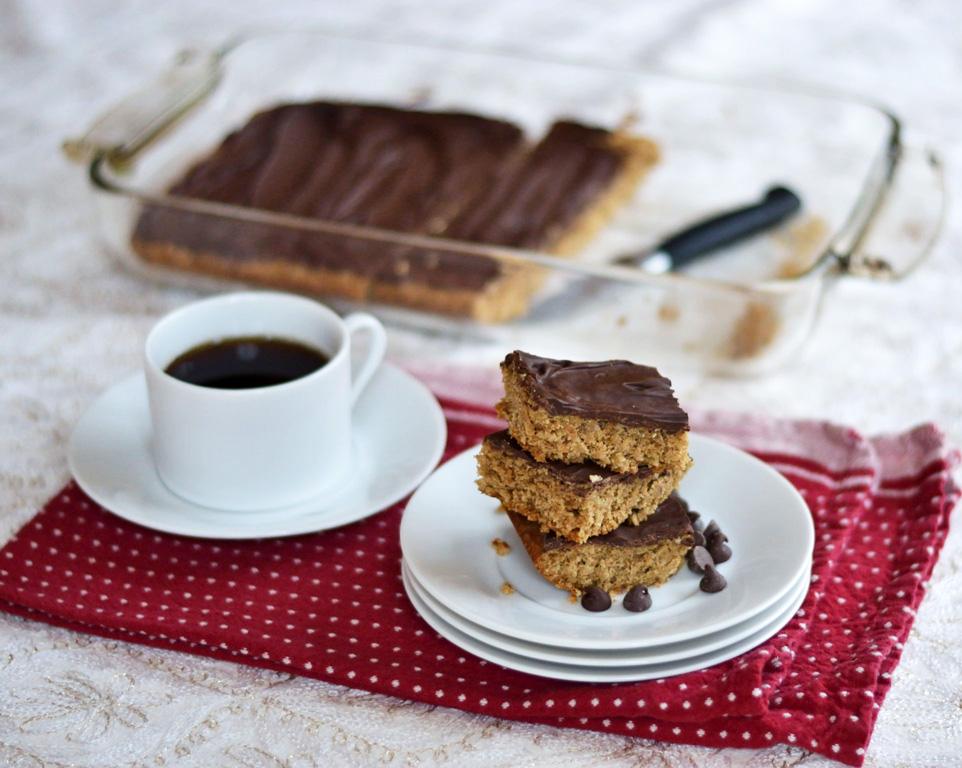
These peanut butter oatmeal bars are the best. Ever. I could eat the whole pan. Or half. Since I did do that, already.

DSC_0827

Mom’s been making them since I was little.

Straight from a Better Homes & Gardens cookbook she’s had forever. With it’s deep red cover  & worn looking pages.

My brother Fred & I would devour them. Because they’re a perfect comfort food treat.

DSC_0818

Full of oats. And peanut butter. And topped off with a hard layer of just enough chocolate.

DSC_0834

It’s easy to eat 1/2 a pan because they’re not too sweet, just sweet enough, and almost fool you into thinking they might be healthy.ish. And the flavors of peanut butter & chocolate flood your mouth as your teeth sink into the soft, chewy bars.

They’re a good choice for a sneaky breakfast treat.

This is the second time I’ve made them vegan and they’re perfect. They taste more or less exactly like the original recipe.

DSC_0815

Peanut Butter Oatmeal Bars

adapted from Better Homes & Gardens New Cook Book

1/2 cup shortening
1/2 cup peanut butter
1 cup brown sugar
1 ener-g egg
1 tsp vanilla
1/3 cup almond or soy milk
1 cup AP flour
1 cup oats (i use quick oats)
1/2 tsp baking soda
1/2 tsp salt
1 cup chocolate chips

Preheat oven to 350F. Grease a 13×9 inch pan.

Beat shortening & peanut butter until well-creamed. Add sugar and continue beating until light & fluffy. Add egg, milk & vanilla and beat to incorporate into fluffy peanut buttery goodness.

Add flour, oats, baking soda & salt – slowly. Beat until well-mixed & smooth.

Spread mixture evenly in your greased pan. It may be a bit thick so spread carefully.

Bake for 18 to 22 minutes or until golden. Remove from oven.

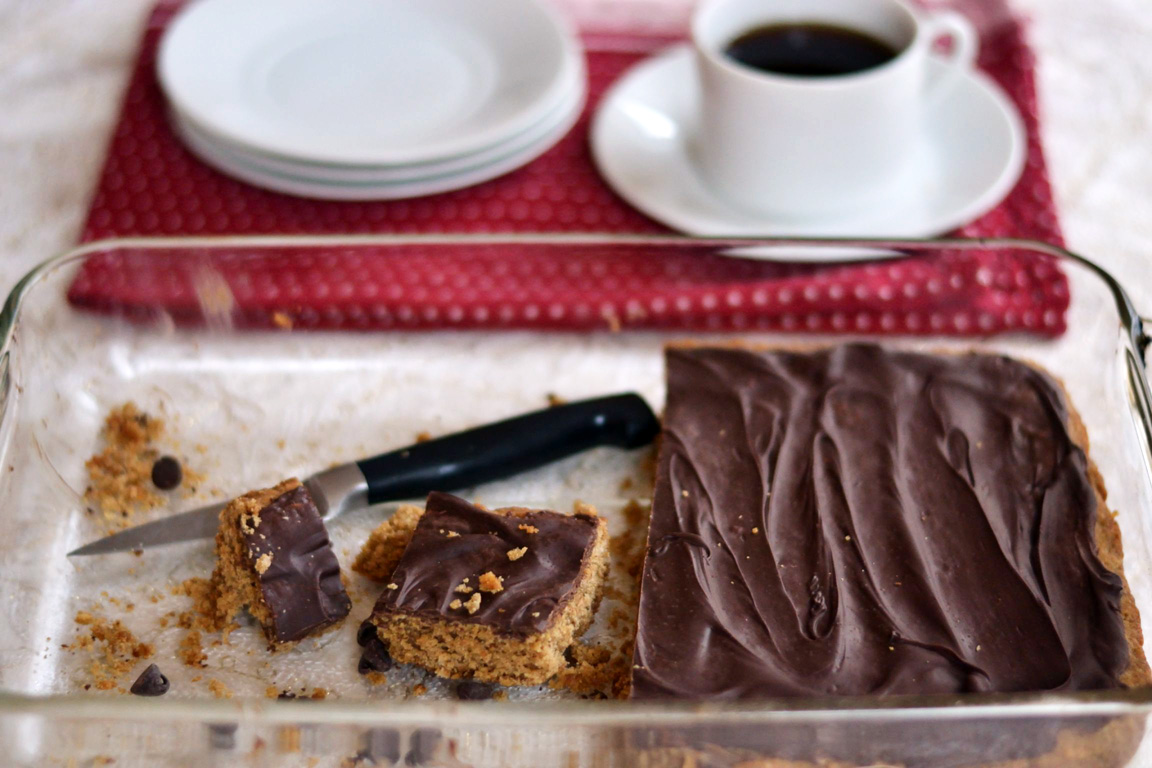
Spread chocolate chips across the surface while still hot. When the chocolate has softened/melted, after a few seconds, spread evenly.

Let cool & allow chocolate to harden before cutting into bars…

Before devouring in huge bites!

DSC_0801

Tabbouleh & Hummus

DSC_0667

Okay, snickerdoodles not what you wanted to start your 2013 resolutions off properly?

Well, don’t worry! I’ve got healthy stuff too!! Delicious, healthy stuff.

I grew up eating Lebanese food on special occasions. Mostly family gatherings, especially Easter. Grandma prepared most of it when I was younger. My cousins and I would sneak into the fridge at night during family reunions to steal the fatayers! We’d sneak a few, thinking we’d be satisfied, and then go back for secret seconds. I loved almost everything grandma made, but tabbouleh was never my favorite. Probably because it’s chock full of parsley and I’m not really a huge fan. But it’s been growing on me in the last few years and now I love it. Well curly leaf more than flat. Especially drenched in lemon juice. Probably thanks to Stephen… who adores Middle Eastern & Mediterranean cuisines. He loves when we make tabbouleh, hummus, pita, grape leaves, or fatayer. And any chance we get to eat it somewhere else. He once “confessed” he loved me because I could make such good Lebanese food. I was flattered!

Tabbouleh & Hummus are an especially great combination. They’re both quick & simple and require no cooking (if using canned beans). They’re also an extremely healthy combo. Chickpeas are full of protein, fiber, Manganese and Iron. While parsley is an excellent source of antioxidants as well as Vitamin C, Vitamin A, Vitamin K, Calcium, Folate, Potassium and even Iron. Most importantly, they’re delicious together – the flavors and textures are perfectly complementary.

So go ahead, indulge. In fresh, wonderful food that you can feel good about.

DSC_0651

DSC_0648

DSC_0645

Tabbouleh

2 bunches curly leaf parsley
1/2 cup bulgur
1 large cucumber
1/2 small red onion
juice of 2 lemons
several tablespoons olive oil
1/4 tsp cinnamon
salt, to taste
chopped mint, optional

Chop parsley finely. Chop mint finely if using (between a couple tablespoons & 1/4 cup).
You can use the food processor if you want, but that’s one more thing to clean!
Peel cucumber, seed & dice. Finely dice red onion.
Add the bulgur wheat to a small saucepan with 1 cup of water. Bring to a boil, stir & remove from heat. Let sit for at least 15 minutes or until water is absorbed.
Combine the parsley, bulgur, cucumber, and onion.
Pour olive oil & lemon juice on top & stir thoroughly.
Refrigerate & nom!

Hummus

1 can chickpeas
2 tbsp tahini
2 tbsp olive oil
juice of 1/2 a lemon (or more)
1/4 tsp salt

This one is easy. Add all ingredients to food processor & blend until completely smooth!
Top with paprika, sumac, or zaatar, and olive oil. Or nothing. However you like it.
Many of my family members prefer it drenched in olive oil.
Refrigerate & nom!

DSC_0660

DSC_0661

Peanut Butter Chocolate Chip Cookies

DSC_0272crop

So I lied. I said this post wouldn’t have chocolate in it. Are you really upset about that? Didn’t think so.

Thanksgiving is over. And so is Black Friday (which I maintain is only for the insane). Which means one thing: It’s time for Christmas cookies!!!!!

I’ve been dying to find a chocolate chip cookie recipe that doesn’t use butter but still tastes as good as Tollhouse. Because everyone knows Tollhouse is the ultimate in traditional chocolate chip cookies. Your grandma’s famous chocolate chip cookie recipe? Tollhouse. Don’t let her lie. She can’t fool you. It’s right off the back of that bright yellow chocolate chip package.

Well these aren’t the Tollhouse recipe, but they are damn good. Just as good. Promise. They’re adapted from a recipe out of my mom’s old faithful Better Homes and Gardens New Cook Book. And they have a slight taste of peanut butter that isn’t overwhelming but adds that butteriness that really makes the chocolate pop.

I thought the cookbook was much older but there are some images of ladies that look like they’re hanging out in the 80s.

Couldn’t find a copyright year.

Moment of truth: These cookies are DELICIOUS. Definitely Christmas worthy.

Peanut Butter Chocolate Chip Cookies
Adapted from Better Homes and Gardens New Cook Book
(it’s pretty old)
Make 4 Dozen

2 1/2 Cups Flour
1/2 Tsp Salt
1 Tsp Baking Soda
1/2 Cup + 1 Tbsp Peanut Butter
1/2 Cup Shortening
1 Cup Brown Sugar
1/2 Cup White Sugar
2 Eggs (regular, flax, or Ener-G)
2 Tsp Vanilla
9oz (1 1/2 Cups) Chocolate Chips

Preheat the oven to 375F.

Beat peanut butter & shortening on medium high until well-creamed and fluffy. Add sugar, beating well after each to maintain the fluffy quality. Add eggs & vanilla and beat for a couple more minutes. You’re essentially whipping the mixture – adding plenty of air.

Add sugar, baking soda, and salt. And beat on low until combined. Stir in chocolate chips. I used only 9oz and trust me, there were chocolate chips falling to the bottom of the mixing bowl & a ton in each cookie.

Using a tablespoon, scoop the dough out of the bowl placing about a dozen mounds on each baking sheet.

Bake for 8 to 12 minutes. 8 minutes for soft & chewy cookies, 12 for golden & crispy cookies.

Let them cool. Or don’t. Choice is yours. I definitely don’t recommend burning your tongue though – because then the rest of the cookies won’t taste nearly as good. But who doesn’t want to eat warm cookies right out of the oven?

Now hide them away in a cookie tin or they’ll all be gone in approximately 2, possibly 3, days.

OR

You can just dive in & stuff your face with delicious cookies. Grab a glass a milk. Or not.

Om nom nom nom nom nom nom.