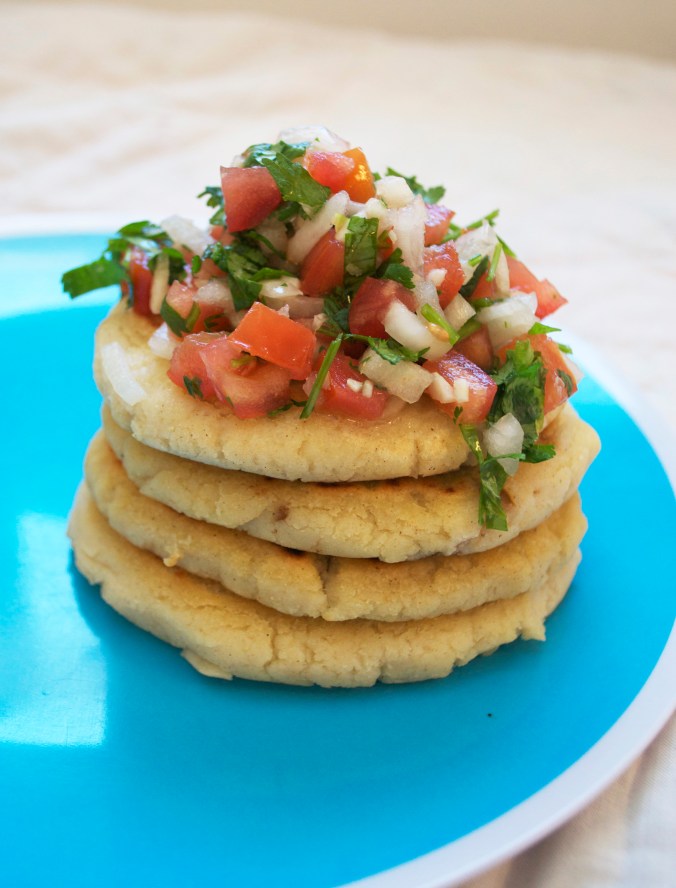
Smoky Poblano & Black Bean Pupusas

Stephen has been trying very very hard to avoid purchasing plastic in general but especially while grocery shopping. (We saw a guy put ONE apple in a plastic produce bag and tie it off!) This means a lot of things to be made from scratch… including tortillas & bread & powdered sugar. But especially tortillas. I don’t do well without, at the very least, one Mexican meal a week. If I had my way, I’d probably eat Latin American cuisine just about every single day. What is a world without salsa??? Not a world I want to live in. And black beans? Nope, I don’t want to live there either.

So we picked up a 5 pound bag of Maseca and Stephen put me to work. Okay, we worked together… 😉 I made the tortillas & he cooked them. Hint: the recipe is on the back of the bag. We don’t have a tortillas press so we used to pieces of parchment paper & one of the 8×8 pyrex pans to smush the living daylights out of a ball of a masa harina, water & salt. And it worked like a damn charm. And then I discovered the best news EVER. I could make more than just tortillas. I could make tamales, pupusas, sopes.

One of my pet names for Stephen is Pupusa… I don’t know how it came to be but it was one of the first things I called him. I thought it was only fitting I make him Pupusas for his birthday (okay, the day before).  The recipe is really simple & they are incredibly delicious. I must warn you though – you must have the patience of a freaking saint to form them. Okay, they’re not that bad… unless you’re a perfectionist.

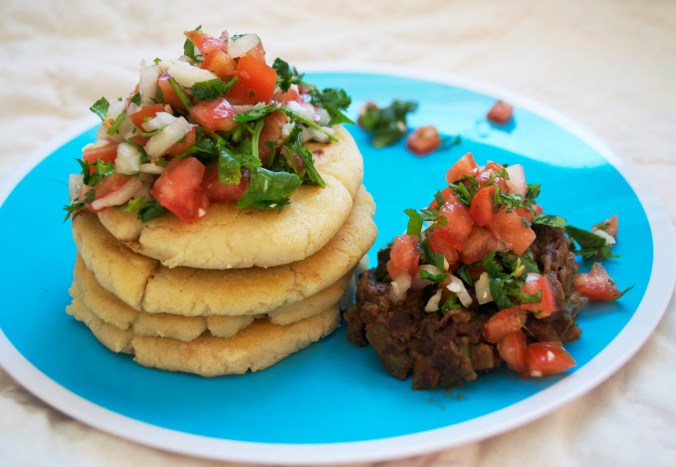
Stephen was gracious enough to let me take these pictures of his food before I let him eat it.

Smoky Poblano & Black Bean Pupusas

Dough:

  • 2 Cups Masa Harina
  • 1 3/4 Cups Warm Water
  • 1/2 Tsp Salt
Combine the above ingredients in a large bowl. The dough should be very moist but not sticky – much moister than for tortillas. You want the dough to be moist enough that it doesn’t crack when you’re forming the pupusas. If the dough dries out a bit as it sits, just add a couple more teaspoons of water. I actually made mine as the filling was cooking. Form into about 8 balls, somewhere between the size of a golf ball & tennis ball.

Filling:

  • 1 Tbsp Olive Oil
  • 1 Med/Large Poblano Pepper, diced
  • 1 Jalapeno, finely diced
  • 1/2 Medium Onion, finely diced
  • 1 Clove Garlic, minced
  • 1 Can Black Beans, rinsed
  • 1 Tsp Chipotle Powder (this makes the filling smoky AND spicy, you can sub smoked paprika for smokiness without the heat)
  • 1/2 Tsp Cumin
  • 1 Tbsp Chili Powder
  • Juice of Half a Lime
  • Salt, to taste
  • 1/2 Cup Water

Heat olive oil over medium heat in a medium/large saute pan. Add poblano, jalapeno & onion. Saute until vegetables are tender and slightly browned. Add garlic and saute for another minute. Add black beans & salt & seasonings. Stir to combine. Add water and simmer gently over medium/low heat until much of the water has cooked down. Smash the black beans to a “refried bean” consistency. Squeeze lime juice into mix & stir to combine. You want the mixture to be thick for stuffing the pupusas.

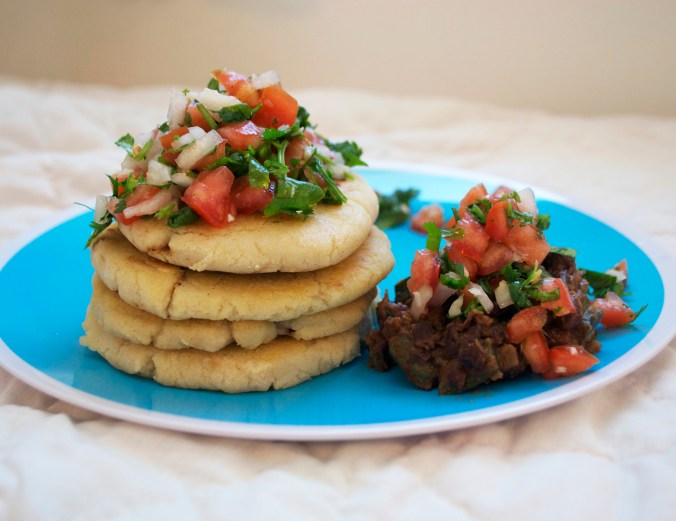
To form: the pupusas, start with one of the masa balls. Form a small bowl by sinking your thumb in the middle & pinching the sides of the dough… much like when you were little and would make little clay bowls. The dough should be less than a centimeter thick. Fill the “bowl” with a couple of spoonfuls of filling. Fold together edges to close. Then flatten into a disk. The edges may crack a little, just muster all your patience to pinch the masa back together. If the filling comes out a bit, don’t worry! It happens. We had leftover filling that I served next to the pupusas. I wish I had some right now.

To cook: the pupusas, heat a splash of olive oil over medium heat in a large pan. Cook pupusas for about 4 minutes on each side or until golden brown on each side.

To serve: the pupusas, top with pico de gallo (as pictured), sour cream, guacamole, lime juice, hot sauce or any of your favorite accompaniments.

These babys were sooo good. They were a bit of a challenge to form but I think with practice I could one day become a professional pupusa maker. They’re certainly worth it. Hot out of the pan with some fresh pico de gallo, they’re a bit crunchy on the outside from the pan fry and gooey with a huge punch of flavor on the inside.

Two sites that I consulted with pictures on how to form the Pupusas:
Dandy Sugar

Better With Butter

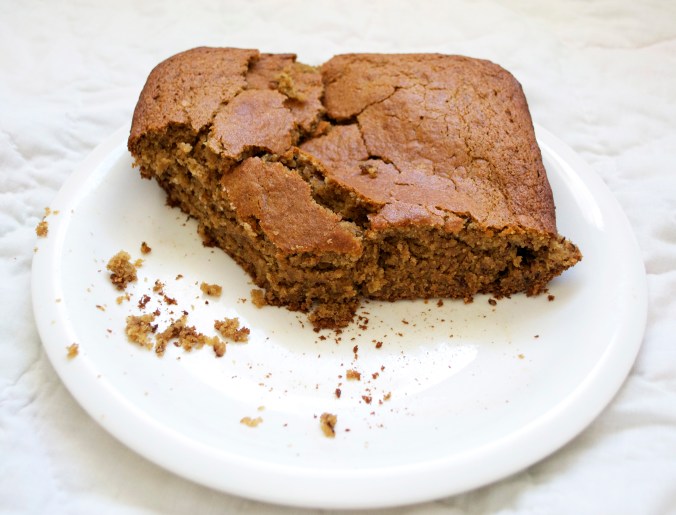
Banana Bread Cake

It’s Stephen’s birthday today! Happy Birthday, Tater Tot!

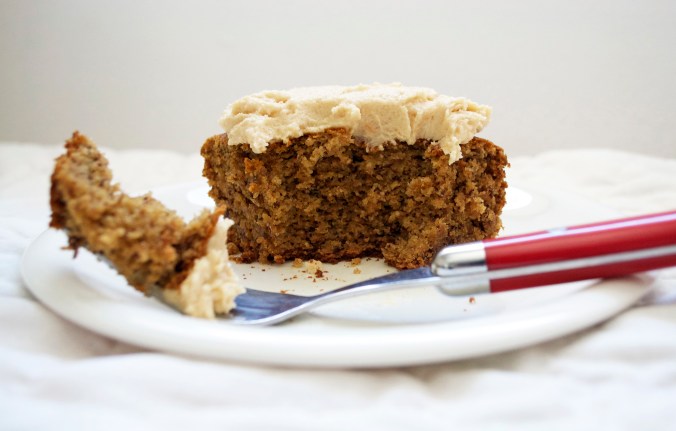
This is not his birthday cake.

He didn’t want me to make his birthday cake until his actual birthday so I’ll be making a Chocolate Guinness Bundt Cake inspired by Fat Girl Trapped in a Skinny Body’s recipe. I’ll post that cake later!

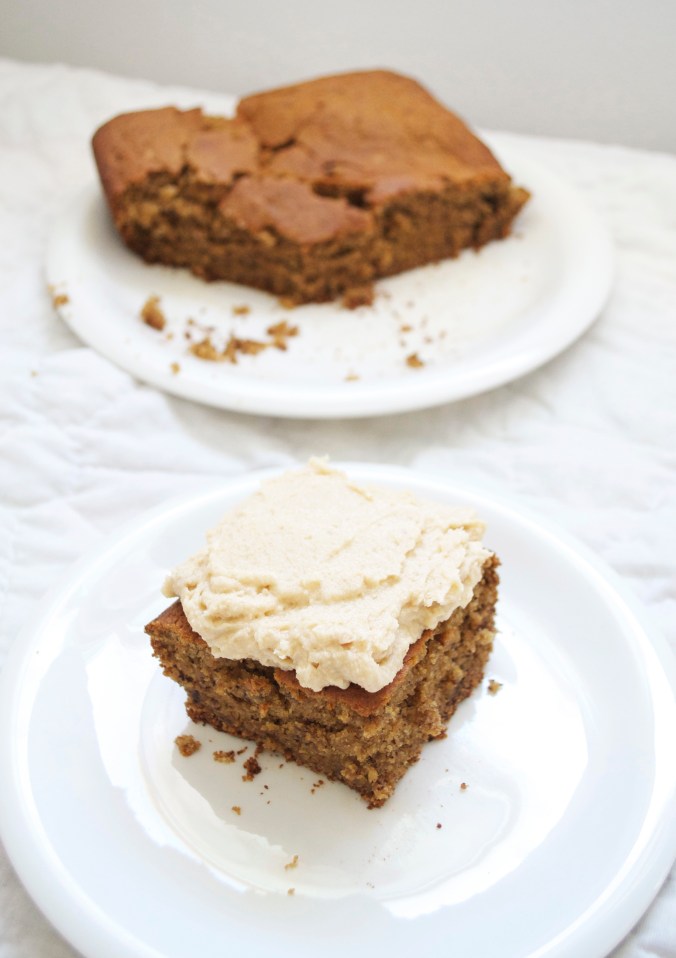
Anyway, we bought a few organic bananas from Wegman’s and I really really wanted to make banana bread. But in the spirit of birthdays I decided to make a cake! (I swear it had nothing to do with the fact that Stephen’s college apartment is not equipped with a loaf pan… but somehow manages to have two 8×8 pyrex pans.) And since I was making a cake I figured I had to add icing! I thought about banana icing and I was like yeck, too much banana. I thought about vanilla icing and I was like meh, boring. I also thought about chocolate icing but I was like hmmm, overpowering. Then I thought about recipes I’ve seen in the past that used peanut butter icing and I thought I’d give it a whirl.

I am going to be totally honest here – I think the banana bread cake would have been BETTER without the icing. I mean, the icing is good icing. It’s just overpowering.. like I thought the chocolate would be. Banana bread itself is moist and delicious and needs NOTHING to make it better. And this recipe is no exception. It’s going to be my new banana bread (cake) recipe. Sure, you could toast it, add a little butter but that’s not really changing the flavor profile. I ate one piece of this cake… Stephen ate the rest. I think he may disagree about the icing.

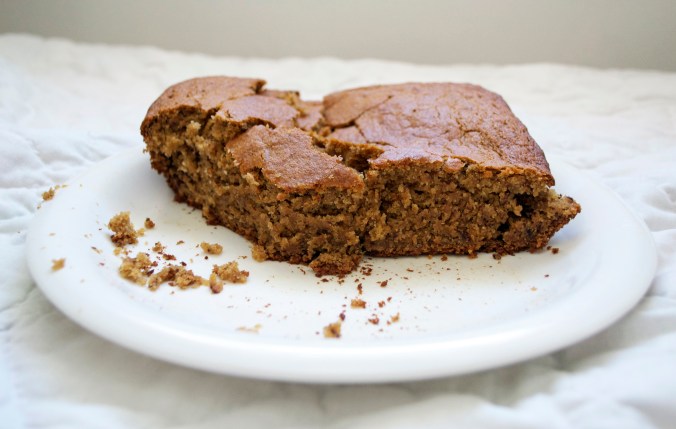
Oh, and I also removed it from the pan like it had to cool or something… like I’d never made a sheet cake in my life or something THEN I tried to flip it over with a long spatula because I thought… well this is a rather small cake… it’ll work. And it landed on it’s side on the table and started to smush and I panicked and oh lord. And then Stephen told me he had just cleaned the table and I thought he was yelling at me but he was really saying “at least I’ve just cleaned the table,” as in, the cake is still perfectly good and not compromised by dirty table. But then I ate a piece of the broken cake without icing… pre-icing… and I was like DAMN THIS SHIT IS GOOOOD.

Banana Bread Cake

  • 3/4 Cup Banana Mash (About 1.5 bananas)
  • 1/4 Cup White Sugar
  • 1/3 Cup Brown Sugar
  • 1 Ener-G Egg (or flax egg, or real egg)
  • 1/2 Cup Oil
  • 1/3 Cup Oat Milk
  • 1/4 Cup Almond Milk (I actually added this at the end because I thought the batter seemed a bit thick… and I had run out of oat milk)
  • 1 Tsp Vanilla
  • 1 1/2 Cups Whole Wheat Flour
  • 1/4 Tsp Salt
  • 2 Tsp Baking Powder
  • 1 Tsp Baking Soda

Peanut Butter Frosting

  • 1/4 Cup Vegetable Shortening
  • 1/3 Cup Peanut Butter
  • 1 1/4 Cup Granulated Sugar
  • 3 Tbsp Almond Milk

Preheat your oven to 350F. Grease an 8×8 glass pan.

Notes: *Stephen’s oven is small (it’s portable). I’d say at least a half foot smaller than most ovens in height & width. I don’t know how this affects temperature/cooking time. So keep an eye on your cake! *The cooking will also be affected if you use a metal pan instead. I find, in a glass pan, cake takes longer to cook. *I used the granulated sugar in the frosting recipe to make homemade powdered sugar, which I then incorporated into the icing. If you already have powdered sugar and want to skip this step the measurements may be slightly different.

To make the cake, in a large bowl, mash 1.5 avg sized bananas. It should make about 2/3 cup of banana mash. Mash it real good 😉

Add the sugar, egg, oil, milk & vanilla. Combine with whisk or fork until everything is fully incorporated.

Add flour, salt, baking powder & baking soda. I always just use my fork and kind of mix the dry ingredients together while they float on the wet before mixing it all together. Why dirty another bowl? Stir it all together until thoroughly combined.

Pour the batter into the already greased baking pan. Cook in oven for 30 – 35 minutes or until top of cake springs back or knife inserted in center comes out clean.

While the cake is cooking, begin making the frosting.

Add sugar to blender and whirl on high speed until sugar is broken down into powdered sugar.

Thoroughly combine shortening & peanut butter in a large bowl (I actually quick rinsed out the first and re-used it).

Add powdered sugar & combine until fully incorporated. Add milk one tablespoon at a time until the frosting is the consistency you prefer.

Wait until the cake has, at least, mostly cooled before icing!

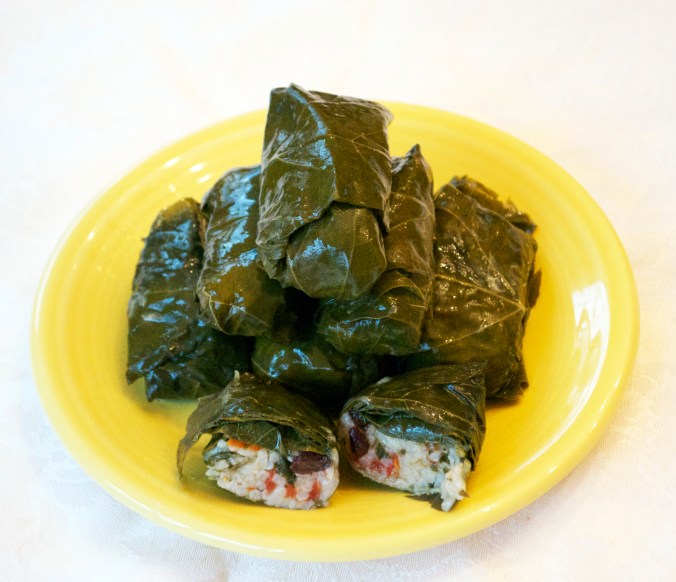
Stuffed Grape Leaves

I love food so much it’s ridiculous. Especially eating it. But making it can be pretty fun too. Especially when I’m not just a full-time veggie chopper. Especially, when you get to cook with family or friends, for special occasions, or particularly exciting dishes.

Every year, as per tradition, our family makes the same Middle Eastern dishes for Easter (and family reunions). My great grandfather, Sam Bitar, and my great grandmother came from the Middle East in the early 1900s. Technically he was Syrian and she was Lebanese… they came over just before the post -WWI French League of Nations Mandate that divided the Ottoman Empire (Contemporary Middle Eastern History with Dr. Saffran filled my brain with far too much knowledge). Thus we consider ourselves Lebanese & Syrian. We make grape leaves, fatayers, hummus, tabbouleh, and kibbe. Kibbe nayyi (raw) for particularly special occasions. And for dessert mahmoul & ka’ak cookies. Hummus & tabbouleh are the only two vegan dishes. So I’ve been developing vegan recipes based off of the traditional ones.

But back to the grape leaves, if you’ve had grape leaves you’ve probably had the lenten version… vegetarian (and maybe you called them Dolmas… which are technically Turkish – it gets complicated). But traditionally, my family stuffed their grape leaves with beef & rice. I think lamb is actually the most traditional (at least according to the cookbooks) but probably becomes rather expensive when you’re churning out huge batches for the entiiiiire family.

The gist is, I grew up watching my mom makes these for significant family gatherings. And I tried to help make them… sometimes. And I definitely helped eat them. Straight our of the pot… when no one was looking. Grape Leaves are absolutely a unique flavor but they’re a bit gooey and very tangy (from the lemons & leaves) and definitely delicious. They’re especially wonderful vegan & dipped in hummus or baba ghanoush.

A Lebanese cookbook my grandmother gave me (she had 2 copies!) has “lenten” variations for many of the usually meat-laden recipes. In other words, during the 40 days before Easter, people eat vegetarian cuisine. Needless to say, the “Lenten” chapter of my cookbook is my favorite.

I checked out the listed recipe for lenten grape leaves before deciding to make up my own. The measurements below are a rough estimate. Because honestly, I kept just throwing more of one ingredient into the 4 cup measurer when I thought it looked like it needed more red or green.

The only tedious part of making Grape Leaves is the stuffing part. It’s actually pretty simple though.

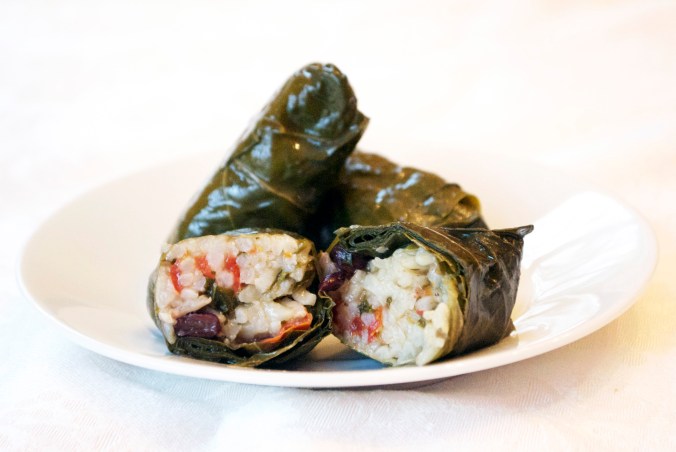
Stuffed Grape Leaves

  • 1 Cup White Rice
  • 1/2 Cup Sliced Grape Tomatoes
  • 1/4 Large Onion, finely diced
  • 3 Tbsp Dried Currants
  • 1/3 Cup Fresh Flat Leaf Parsley, chopped
  • 3 Tbsp Mint, Chopped
  • 1 Tsp Cinnamon
  • 1/4 Cup Olive Oil
  • Salt
  • 1 Jar Grape Leaves (You’ll only use about 20 – 30 Leaves)
  • 2 – 3 Lemons, sliced thin

Combine all the ingredients in a bowl and stir thoroughly to combine and coat rice.

Remove a hunk of grape leaves from the jar. They usually come in portions… they roll up about 20 – 40 leaves and shove them in the brine. Rinse the hunk of grape leaves under cold water, just to get a bit of brine off.

You want to use the larger grape leaves. About 6 inches in diameter or so. If you want to be a pro and happen to find a bunch of smaller leaves tucked in there, you can overlap them to make “one” larger grape leaf.

On a cutting board, spread grape leaf with the veins of the leaf facing up. Fill center with about 2 Tbsp of rice filling. Mom always makes hers longer & thinner but I’ve always liked mine shorter & fatter so you can spread the filling to your liking. I do about 2.5 – 3 inches long.

Next, you must rolllllll the grape leaf. Which is just like making a burrito. Which, anyone who’s worked at a Chipotle has mastered… unless you’ve worked in State College – your grape leaves may fall apart, much like your burritos. (Okay, some of their staff are definitely professionals, I’m only teasing).

1. Fold the end closest to you up over the rice.

2. Fold in the left & right sides over the top.

3. Roll the filling up the leaf until the top is sealed. You want to make sure they’re rolled well, snug but not “tight.” You don’t want them to fall apart in the simmering water but you want a bit of room for the rice to expand when it cooks.

If my directions make absolutely no sense because I am completely incompetent at explaining kitchen techniques… I’m more of a teach by show kinda gal…. there is a wonderful series of pictures at SouSou Kitchen that show the steps to rolling a grape leaf…. I suggest you visit the site since I don’t even think I understand what I’m explaining. Maybe it’s because it’s really quite simple  – I swear!

Line a large-ish pot with the grape leaves to make a single bottom layer. Squeeze them in snug. Layer the slices of lemon on top of your bottom layer of grape leaves. Now, make a second layer of grape leaves in your pot. Mine didn’t quite fill a second layer, which proved to be slightly detrimental to the whole… grape leaves staying together thing. Or maybe I just didn’t make them “snug” enough. Doh! Top with more sliced lemon. Then fill pot with water until grape leaves are JUST covered. My mom says it’s as simple as cooking rice… which is essentially what you are doing. But I wasn’t that calm. Bring the water to a boil and then reduce to a simmer. Cook until most of the water is absorbed and the rice is thoroughly cooked (aka act like you’re cooking rice, because you are). Some liquid will remain. I like to call this the “juice.” It’s lemony and helps the grape leaves stay moist & flavorful so don’t throw it away… unless you’re going to eat them all immediately. Which is fine by me!